Getting Started
Trial version
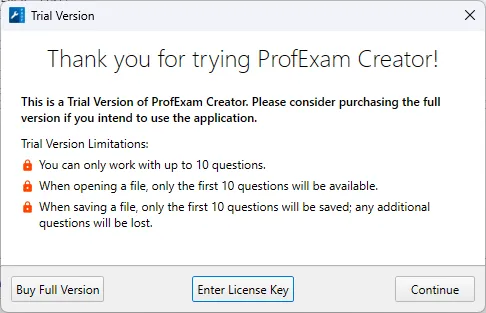
Until it is activated, the application works as a trial version. At startup, the Trial Version window shows the limitations:
- you can work with no more than 10 questions;
- when you open a file, only the first 10 questions are available;
- when you save a file, only the first 10 questions are saved and the rest are lost;
- a watermark is added to printed pages.
The full version has no limitations. Window buttons:
- Continue — keep working in the trial version;
- Enter License Key — enter your key and activate the application (see License and Activation);
- Buy Full Version — open the purchase page.
Main window
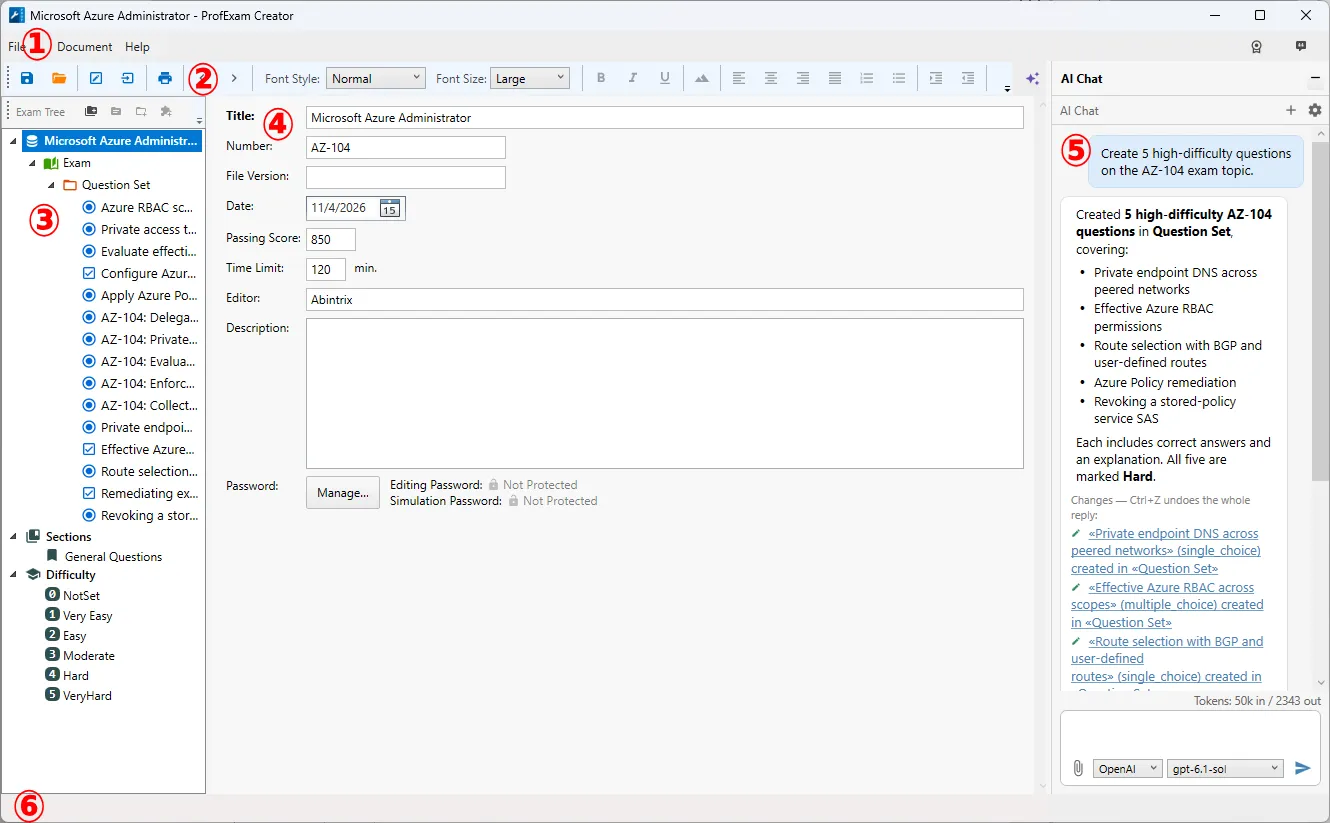
- Menu — File, Document, Help.
- Toolbar — save, open, Import Editor, print, navigation between questions and text formatting buttons.
- Exam Tree — the structure of the document: exams, question sets, questions, sections and difficulty levels. Above the tree are buttons for creating an exam, question set, testlet and question.
- Editing area — shows the properties of whatever is selected in the tree: the test, an exam, a question set or a question.
- AI chat — the right panel, opened and closed with
Ctrl+Alt+I(see AI Chat). - Status bar — loading and saving progress, application messages.
In the top right corner of the window:
- the Activate button — visible while the application is not activated;
- the license information button;
- the update icon — appears when a new version is available;
- the feedback button — send the developers a bug report or a suggestion.
Menu
| Menu | Items |
|---|---|
| File | New, Open..., Import Editor..., Import JSON..., Add Questions from File..., Save, Save As..., Print..., Quit |
| Document | Undo, Redo, Search..., All Images..., AI Chat |
| Help | Website, Feedback..., License Information..., Activate, About |
Your first test in 5 minutes
- Choose File → New (
Ctrl+N). An empty test called Untitled Test is created. - Click the test in the tree and fill in its properties: title, number, author, passing score, time limit (see Test properties).
- Right-click the test → New Exam to add an exam.
- Right-click the exam → New Question Set to add a question set.
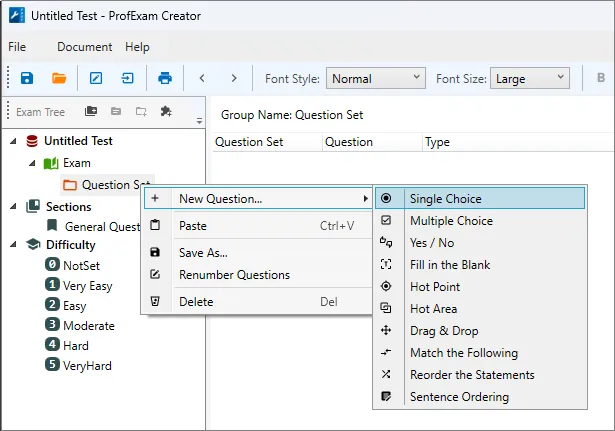
- Right-click the question set → New Question..., choose the question type and how many questions to add, and click OK.
- Select a question in the tree, type the question text and the answer options, and mark the correct answer.
- Save the file: File → Save (
Ctrl+S).
Opening a file
File → Open... (Ctrl+O) opens a .vcex file. Files of all ProfExam format versions are supported. Older files open as usual and are saved in the current format.
If the file is protected with an editing password, the application asks for it (see Passwords).
If the file was created in a newer version of the application, you will be offered to download the update.
Undo
Document → Undo (Ctrl+Z) undoes the last action, Document → Redo (Ctrl+Y) brings it back. You can undo adding and deleting questions, question sets and exams, moving, changing the type, changing the section and difficulty, and edits made by the AI chat.